Logo
11 Oct 2024

How to Connect a Logitech Wireless Mouse: A Complete Guide

Post by Dakota

Logitech wireless mice are known for their convenience, portability, and reliability. Whether you’re upgrading your tech setup or simply replacing a wired mouse, knowing how to connect your Logitech wireless mouse is crucial for smooth operation. In this guide, we’ll walk you through the process of connecting via USB receiver or Bluetooth and help you troubleshoot common issues along the way.

What Is a Logitech Wireless Mouse and Why Use It?

A Logitech wireless mouse eliminates the need for cumbersome cords, offering seamless control over your devices. This type of mouse comes with either a USB receiver (also known as a dongle) or Bluetooth functionality, allowing users to connect without wires.

  • Here are a few reasons why Logitech wireless mice are a popular choice:
  • Convenience: No tangled wires, just smooth wireless functionality.
  • Portability: Ideal for those who travel frequently or work on the go.
  • Multiple device pairing: Many Logitech mice allow you to pair with more than one device at a time.
  • Customizable features: With Logitech’s software, you can customize the buttons and functions of the mouse to meet your specific needs.
  • Long battery life: Some models last for months on a single battery, enhancing productivity without constant recharging.
  • Now, let’s look at how to set it up!

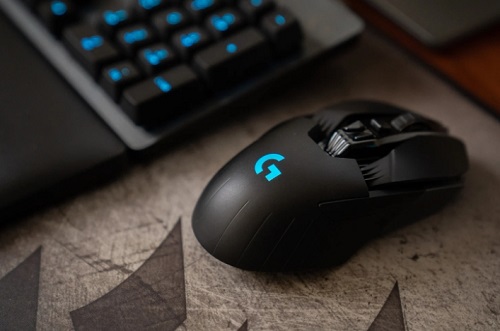
    Logitech Mouse

    How to Connect a Logitech Wireless Mouse via USB Receiver

    Most Logitech wireless mice come with a USB receiver, which allows for quick and easy setup. Here’s how to connect your mouse using the USB receiver:

  • 1.Unbox and Prepare the Mouse: Make sure your mouse is turned off and insert the battery (usually provided in the package). Check if the mouse comes with a battery already installed. Turn on the mouse using the power switch located at the bottom.
  • 2.Insert the USB Receiver: Plug the small USB receiver (usually found in the mouse’s battery compartment) into an available USB port on your computer or laptop.
  • 3.Turn On the Mouse:After inserting the receiver, turn on your Logitech mouse. You should see a light indicator confirming it’s powered up.
  • 4.Wait for Automatic Setup: Most modern computers will automatically recognize the mouse and install the necessary drivers. Wait for a few seconds as the system completes the process.
  • 5.Test the Mouse: Move your mouse around to see if the cursor responds. If it does, you’re good to go!
  • If your mouse isn’t responding after following these steps, skip ahead to the troubleshooting section for help resolving connection issues.

    How to Connect a Logitech Wireless Mouse via Bluetooth

    Some Logitech wireless mice offer Bluetooth connectivity, which eliminates the need for a USB receiver. Here’s how to connect via Bluetooth:

  • Turn on the Mouse: Make sure the mouse is switched on. Many Logitech models feature a small switch on the bottom to toggle power.
  • Enable Bluetooth on Your Device: Open your device’s Bluetooth settings. On Windows, this can be found in “Settings” > “Devices” > “Bluetooth & other devices.” On macOS, go to “System Preferences” > “Bluetooth.”
  • Pair the Mouse: Press and hold the Bluetooth button on the bottom of the mouse until the LED starts blinking. This puts the mouse in pairing mode. On your computer, find your Logitech mouse under the list of available Bluetooth devices and click to pair.
  • Complete Pairing: After selecting the mouse, wait a few seconds for your device to finish pairing. Once connected, your mouse should be ready to use.
  • Test the Connection: Move the mouse and check if the cursor moves on the screen.
  • Bluetooth connections are often ideal for devices with limited USB ports. If you experience issues during the pairing process, refer to the troubleshooting section below.

    Common Connection Issues and How to Fix Them

    Even though connecting a Logitech wireless mouse is usually straightforward, you may encounter some issues. Here are common problems and their solutions:

  • Mouse Not Detected by USB: Try using a different USB port or restarting your computer. Ensure that the USB receiver is securely plugged in.
  • Bluetooth Pairing Fails: Make sure the Bluetooth is turned on and your device is discoverable. Move the mouse closer to the device to strengthen the connection.
  • Cursor Lags or Mouse Disconnects: Low battery power may cause lagging or disconnection. Replace the battery or recharge if applicable.
  • For Bluetooth models, minimize interference from other wireless devices.
  • Unresponsive Mouse: Check if the power is on. Try turning off the mouse, waiting a few seconds, and then turning it back on. Reset the mouse by removing the battery and reinserting it after a minute.
  • Conclusion

    Connecting a Logitech wireless mouse is a simple process, whether you’re using a USB receiver or Bluetooth. Following the steps in this guide will ensure a smooth connection. If you encounter any issues, troubleshooting is straightforward and can usually resolve any problems. With its ease of use, portability, and customization options, a Logitech wireless mouse is a great addition to any tech setup.

    FAQs

    Why won’t my Logitech wireless mouse connect to my computer?

    Your mouse may not connect due to a weak battery, faulty USB port, or interference with Bluetooth. Try replacing the battery, switching USB ports, or restarting your computer.

    Can I connect my Logitech wireless mouse to multiple devices?

    Yes, many Logitech wireless mice support multi-device pairing. You can switch between devices by using a button located on the bottom or side of the mouse.

    How do I update the software for my Logitech wireless mouse?

    Download the latest software updates through Logitech Options or Logitech Unifying Software. Check for updates regularly to ensure optimal performance.

    0 Comments