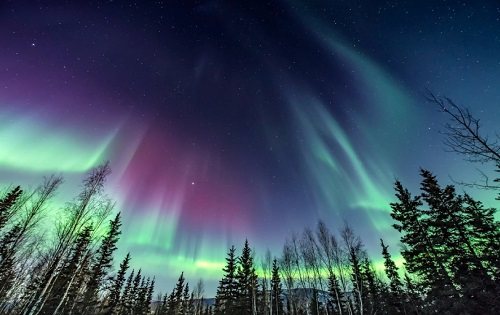
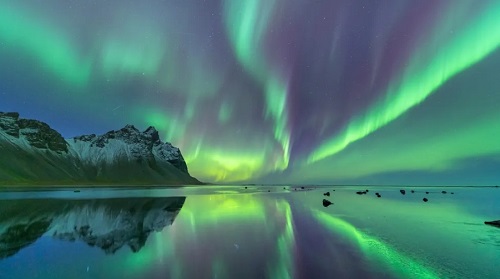
Capturing the Northern Lights with your phone is an exciting and achievable goal. This guide will teach you how to see the Northern Lights with your phone, from adjusting settings to finding the perfect location. You don’t need expensive equipment; with the right tips and tools, your smartphone can capture this stunning phenomenon. Learn the best settings for your phone, the top apps to enhance your experience, and the ideal locations to view the Northern Lights. With careful preparation and the right techniques, you’ll be able to take breathtaking photos of the aurora borealis using just your phone. Whether you’re an amateur photographer or a seasoned traveler, this guide provides all the information you need to make the most of your Northern Lights adventure.

Can You Really See the Northern Lights with Your Phone?
Yes, you can see and capture the Northern Lights with your phone. Modern smartphones come equipped with advanced camera features that can effectively capture low-light scenes. While a phone might not match the quality of a professional camera, it can still produce impressive images of the aurora borealis. The key is to understand and utilize your phone’s camera settings properly. Features like manual exposure adjustment, ISO settings, and night mode can significantly enhance your photos. Additionally, various apps can help optimize your phone’s performance and guide you to the best viewing spots. With patience and the right techniques, you can successfully see and photograph the Northern Lights with your smartphone.
How to See the Northern Lights with Phone in Steps
Step 1: Best Phone Settings for Capturing the Northern Lights
Adjusting Exposure and ISO
To capture the Northern Lights with your phone, start by adjusting the exposure and ISO settings. Set your phone’s camera to manual mode. Increase the exposure time to allow more light to enter the lens, typically between 10 to 30 seconds. For ISO, choose a higher setting, such as 800 to 1600, to enhance the camera’s sensitivity to light. However, be cautious as too high an ISO can introduce noise into your photos. Experiment with different settings to find the best combination that works for your specific phone model and the intensity of the aurora borealis.

Focus and White Balance Tips
Proper focus and white balance are crucial for capturing clear and vibrant images of the Northern Lights. Switch your phone camera to manual focus mode, and set it to infinity to ensure the stars and aurora are sharp. For white balance, use the daylight setting to maintain the natural colors of the Northern Lights. Alternatively, experiment with different white balance presets to see which one best captures the hues of the aurora. Adjusting these settings manually will help you get the most accurate and visually appealing photos.
Using Night Mode Effectively
Many modern smartphones come with a night mode feature designed to enhance low-light photography. Activate night mode to capture the Northern Lights more effectively. Night mode typically increases the exposure time and optimizes other settings automatically. Hold your phone steady or use a tripod to prevent motion blur during the longer exposure. Night mode can significantly improve the brightness and detail of your photos, making it easier to capture the stunning colors and movements of the aurora borealis.
Step 2: Best Locations to See the Northern Lights with Your Phone
Popular Viewing Spots
Choosing the right location is essential for seeing the Northern Lights. Popular spots include Tromsø in Norway, Abisko in Sweden, and Fairbanks in Alaska. These locations are within the auroral zone, where the chances of seeing the Northern Lights are highest. Clear, dark skies away from city lights provide the best conditions for viewing. Research local spots and consider booking guided tours that can take you to prime viewing locations.
Timing and Weather Conditions
Timing and weather conditions play a crucial role in seeing the Northern Lights. The best time to view the aurora borealis is during the winter months, from September to March when nights are the longest. Check the aurora forecast and aim for nights with high solar activity and clear skies. Avoid nights with heavy cloud cover, as it can obscure the lights. Being patient and staying informed about the weather can increase your chances of a successful viewing.
Local Tips and Guides
Local tips and guides can enhance your Northern Lights experience. Talk to local residents or tour guides who are familiar with the best viewing spots and conditions. They can provide insights on when and where to go for optimal viewing. Joining a guided tour can also be beneficial, as guides often have the expertise to take you to less-known but excellent locations. They can also help with camera settings and provide other useful tips for capturing the Northern Lights with your phone.
Step 3: Top Apps to Enhance Your Northern Lights Experience
Several apps can enhance your Northern Lights experience by providing real-time aurora forecasts, camera settings tips, and more. Apps like My Aurora Forecast, Aurora Alerts, and Northern Eye Aurora Forecast offer detailed aurora predictions and alerts. They use data from space weather sources to predict the best times and locations for viewing the Northern Lights. These apps often include cloud cover forecasts and geomagnetic activity indices, helping you plan your viewing sessions more effectively. Camera apps like NightCap and ProCamera can help you get the best shots by offering advanced features like manual controls, long exposure, and noise reduction. NightCap, for example, is designed specifically for low-light photography and includes settings for capturing stars and auroras. ProCamera provides extensive manual controls and RAW shooting capabilities, giving you greater flexibility in post-processing.
Conclusion
Knowing how to see the Northern Lights with your phone can transform your aurora-viewing experience. By adjusting your phone’s settings, choosing the right locations, and using helpful apps, you can capture stunning images of this natural wonder. Start by familiarizing yourself with your phone’s camera features, such as manual exposure and ISO settings, which are crucial for low-light photography. Seek out popular viewing spots known for their clear skies and minimal light pollution. Apps that provide real-time aurora forecasts and camera tips can significantly enhance your chances of capturing the perfect shot. Preparation and patience are key to successful Northern Lights photography. Be ready to spend several hours in the cold, watching the sky for the aurora to appear. With the right techniques and tools, you can enjoy and document the breathtaking beauty of the aurora borealis using just your smartphone.
FAQs:
1: What are the best times to see the Northern Lights?
The best times to see the Northern Lights are during the winter months, from September to March, when nights are longest. Peak viewing hours are typically between 10 PM and 2 AM. Checking aurora forecasts and choosing nights with clear skies and high solar activity can increase your chances of witnessing this phenomenon.
2: Can any phone capture the Northern Lights effectively?
Most modern smartphones with advanced camera features can capture the Northern Lights effectively. Phones with manual settings for exposure and ISO, as well as night mode, are particularly well-suited for this purpose. While some phones may produce better results than others, understanding and utilizing your phone’s capabilities is key to capturing the aurora borealis.
3: Do you need a tripod to see the Northern Lights with your phone?
Using a tripod is highly recommended for seeing the Northern Lights with your phone. A tripod keeps your phone steady during long exposure shots, preventing motion blur and ensuring clear, sharp images. If you don’t have a tripod, try stabilizing your phone on a solid surface to achieve the best results.

0 Comments