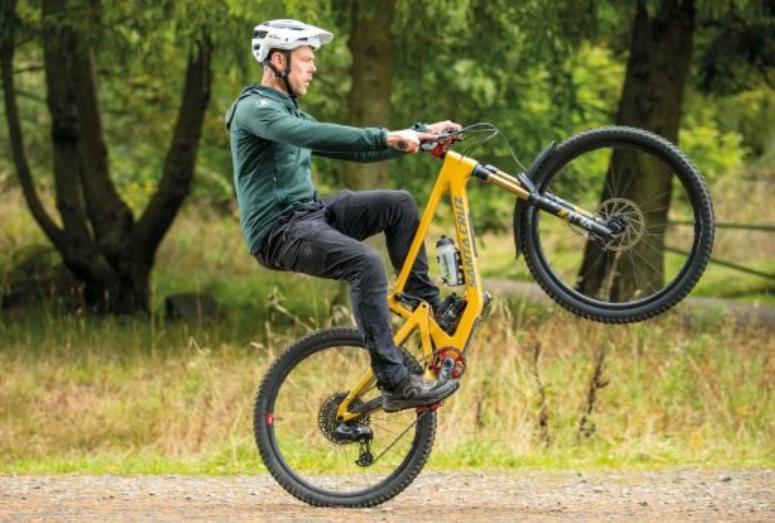
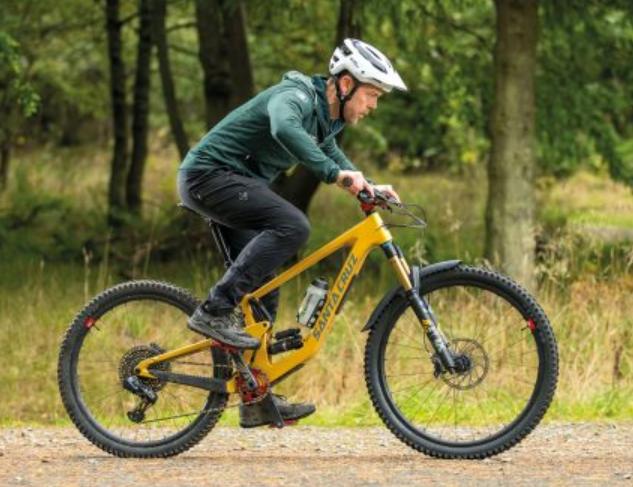
Learning how to wheelie a mountain bike is a skill that separates casual riders from true enthusiasts. Whether you’re looking to impress your friends, navigate technical terrain, or simply enjoy the thrill of balancing on one wheel, mastering the wheelie is a must. This guide will take you through the essential steps to perfecting your wheelie technique. We’ll cover everything from the basics of lifting your front wheel to common mistakes and safety tips, ensuring you have the knowledge and confidence to wheelie like a pro.

Why Learn How to Wheelie a Mountain Bike?
Benefits of Mastering the Wheelie
Mastering the wheelie isn’t just about showing off; it offers several practical benefits for mountain bikers. A wheelie can help you navigate obstacles on the trail, such as rocks, roots, and logs. It also improves your bike control, making you a more confident and capable rider. Furthermore, learning to wheelie enhances your balance and coordination, skills that are essential for tackling challenging trails. By practicing wheelies, you’ll develop a deeper connection with your bike, allowing for smoother and more intuitive handling in various riding conditions.
How Wheelies Improve Your Mountain Biking Skills
Wheelies are more than a flashy trick—they’re a valuable tool for improving your overall mountain biking skills. When you lift the front wheel, you engage your core, strengthen your arms, and enhance your sense of balance. These improvements translate to better control over your bike, particularly in steep or uneven terrain. Additionally, the focus required to maintain a wheelie sharpens your concentration, which is crucial when navigating technical sections of a trail. As you become more proficient at wheelies, you’ll notice a significant boost in your confidence and ability to handle your bike in various scenarios.
How to Wheelie a Mountain Bike: Step-by-Step Instructions
Preparing Your Bike and Finding the Right Terrain
Before attempting to wheelie, make sure your bike is properly set up. Lower your saddle to give yourself more room to maneuver and ensure your tires are inflated to a pressure that provides good traction. Choose a lightweight gear that allows you to pedal with ease. It’s also crucial to find a suitable practice area. A flat, open space with a slight incline is ideal for beginners. The slight uphill helps with balance and prevents you from gaining too much speed. Avoid areas with obstacles or traffic until you’ve gained more confidence in your wheelie skills.
Step-by-Step Guide to Lifting Your Front Wheel
Start by pedaling at a moderate speed. As you reach a comfortable pace, crouch slightly by bending your knees and elbows. Then, pull up on the handlebars while simultaneously pushing down on the pedals with force. This motion will cause the front wheel to lift off the ground. Keep your arms extended, and lean back slightly to maintain balance. The key is to find the right balance between pedal power and body position. As the front wheel rises, continue to pedal smoothly, using your core muscles to keep the bike stable. Practice makes perfect, so don’t be discouraged if you don’t get it right away.
Common Mistakes When Learning to Wheelie and How to Avoid Them
Incorrect Body Position
One of the most common mistakes riders make when learning to wheelie is incorrect body position. Leaning too far forward can cause the front wheel to drop quickly, while leaning too far back can lead to a loss of control and potential falls. To avoid these issues, focus on maintaining a centered position over the bike. Keep your arms straight but not locked, and use your core to stabilize your movements. Practice shifting your weight slightly until you find the sweet spot where the front wheel stays up without wobbling. Remember, body position is crucial to a successful wheelie.
Misjudging Speed and Balance
Another frequent mistake is misjudging speed and balance. Going too fast can make it difficult to control the wheelie, while going too slow might not provide enough momentum to lift the front wheel. The solution is to find a moderate speed that allows you to balance the bike with ease. Start with a gentle pedal stroke, and gradually increase your speed as you become more comfortable. If you feel yourself losing balance, gently tap the rear brake to bring the front wheel down smoothly. Consistent practice will help you develop a better sense of the speed and balance required for a successful wheelie.

How to Safely Practice Wheelies on a Mountain Bike
Protective Gear for Safe Wheelies
Safety should always come first when practicing wheelies. Wearing the right protective gear is essential to prevent injuries. Start with a quality helmet that fits snugly and offers full coverage. Gloves are also important, as they provide better grip and protect your hands in case of a fall. Consider wearing knee and elbow pads, especially if you’re practicing on rough terrain. If you’re new to wheelies, you might also want to invest in a chest protector to safeguard against impacts. Having the right gear ensures that you can practice with confidence, knowing that you’re protected from potential accidents.
Best Practice Locations and Conditions
Choosing the right location and conditions for practicing wheelies can make a big difference in your progress. Look for a flat, open area with a slight incline, as this type of terrain provides the best balance between control and challenge. Avoid practicing in areas with traffic, pedestrians, or obstacles that could interfere with your learning process. Early morning or late afternoon are ideal times to practice, as the lighting is softer and there are fewer distractions. Additionally, make sure the ground is dry to avoid slipping. Consistent practice in a safe environment will help you build the skills needed to master the wheelie.
Conclusion
Mastering how to wheelie a mountain bike takes time, patience, and practice, but the rewards are well worth the effort. By following this step-by-step guide, you’ll learn the essential techniques needed to lift your front wheel with confidence and control. Remember to practice regularly, avoid common mistakes, and always prioritize safety by wearing the appropriate gear and choosing the right practice locations. With dedication and persistence, you’ll soon be performing wheelies like a pro, adding a new dimension of excitement and skill to your mountain biking adventures.
FAQ
1. How long does it take to learn to wheelie a mountain bike?
The time it takes to learn how to wheelie a mountain bike varies depending on your current skill level and how often you practice. On average, with regular practice, most riders can start to see progress within a few weeks. It’s important to be patient and focus on mastering the basics before attempting longer or more complex wheelies. Consistency is key to developing the muscle memory and balance required for this skill.
2. Can you wheelie on any type of mountain bike?
Yes, you can wheelie on most types of mountain bikes, though some bikes are better suited for it than others. Bikes with shorter chainstays and a more upright geometry make it easier to lift the front wheel. However, with practice, you can learn to wheelie on almost any mountain bike, whether it’s a hardtail, full suspension, or even a fat bike. The key is to adjust your technique to match the bike’s characteristics.
3. What should I do if I keep falling backward during a wheelie?
Falling backward during a wheelie is a common issue for beginners. To avoid this, make sure you’re not leaning too far back or pulling up too hard on the handlebars. Instead, focus on maintaining a balanced position over the bike, with your weight slightly forward. If you feel yourself tipping backward, gently tap the rear brake to bring the front wheel down. Practicing in a controlled environment with soft ground can also help you build confidence without the fear of injury.

0 Comments